


One of the most exciting parts of the build for me is happening right now. When you get your cabinets and tiling done, that’s when you start to get a real sense of how the decisions and selections you made all those months ago come together, and you hope it all turns out as you imagined.
For us, like many people, the kitchen cabinetry was the thing we obsessed over the most, and the drama over some of the result was worthy of a soap opera (or is that a sitcom?!). This is the result! We’re generally happy with how things turned out, but we do wish we’d paid more attention to some things.
In the kitchen, we used black Cleaf Yosemite timber veneer, and overall I like how it looks. Nulook was kind enough to let us use their tilers to do the main flooring, which they did a great job with. The kitchen tiling isn’t quite finished as the waterfall stone ends for the island needs to go in. Also, there was a problem with the dishwasher. More on that in a minute.
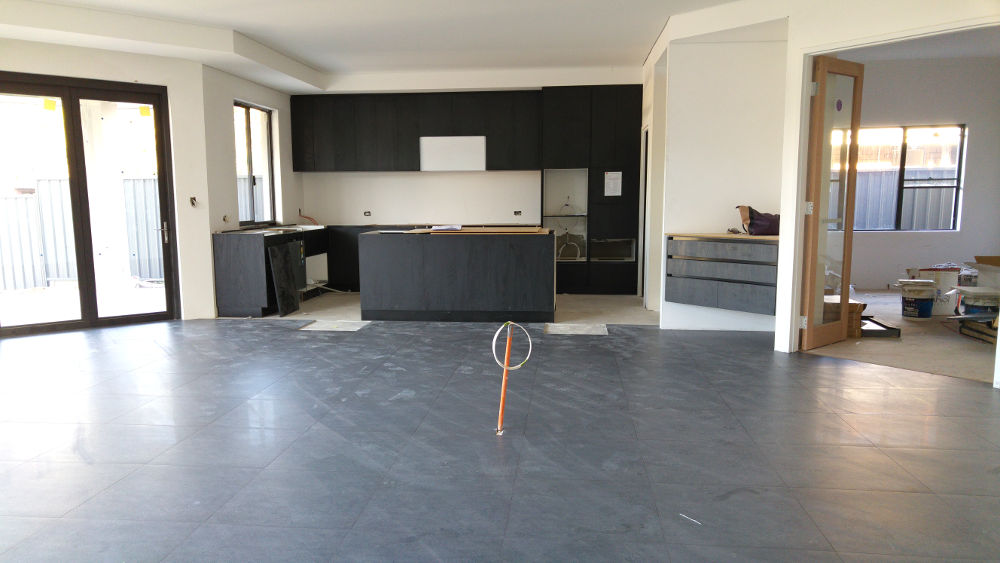
Kitchen cabinetry and tiling to the main living area.
Up close, it appears that a lot of dust has settled in along the joins and I worry about cleaning it off.
There were some other surprises with the cabinets. We’d deliberately gone for a handleless look, which meant that a c-channel was used to provide a gap between the drawers to enable them to be opened. Initially, I was uncomfortable with shininess of the finish of the channels – I thought it would be less glossy, and more of a matte finish. The cabinet maker didn’t have any samples to show us, so we kind of went in blind on this. You can see the effect in the above photo, in the coffee station on the right. This has grown on me with the passage of time, and the thought that the ovens will be kind of glossy black, but initially it seemed a bit jarring.
I also found the spacing of the channels in the set of drawers on the left a bit unusual, but having seen other kitchens since then, it appears that the layout wasn’t that unusual. After digging into this a bit, laying them out in this way actually gave us more height in the drawers. In any case, it was set out that way on the plans which we’d approved. If only I’d read them properly before approving, we could have avoided some of these surprises.
Also set out in the plans we approved, was the push to open mechanism of the overhead cupboards. I’m really kicking myself now that I didn’t read the plans properly and failed to notice that push to open was indicated, as never at any point did I want that. In my head, I was always against push to open, and I always thought the overheads were going to be pull to open, where the door just hangs down a bit so you can get your fingers behind. I was so convinced that this was going to be the case that I didn’t even bother to check. Even now, I find myself opening them as if they were pull to open, only they don’t have the overhang so it gets frustrating. But, we’re not planning on using the overheads much anyway, so maybe this won’t matter so much. (Except maybe when I’m looking for the chocolate that Mr. Trixee keeps threatening to hide from me!).
Possibly the biggest aggravation is that the dishwasher didn’t seem to be measured up properly, consequently the cabinet heights and depths were a bit off, such that installation then proved to be a problem. Getting the dishwasher out when it fails (as they inevitably do) was the biggest concern. It was doubly frustrating as they had the dishwasher there the entire time. This is currently being looked at and no doubt will be fixed in due course.
But let’s move on from the kitchen, to the bar. For whatever reason, the bar is my favourite part of the cabinetry. I really like the proportions of the overheads, and think it looks really neat. I’m now glad that we didn’t go the route of glass inserts, because I think it looks a lot sleeker and classier as it is now. (The mirror spashback yet to be added will provide just the right amount of bling, I think.)

Bar cabinets
Here’s a view of the hallway looking towards the front. One of the main reasons for using the same tiler is that we wanted the main floor to flow throughout the house, so there is a seamless transition from the laundry (doorway below left) through the hallway, and the powder room (doorway below right), as well as to the main living area. They did a great job here.

Tiling in the hallway
Next on our tour is the guest bathroom. We had to try and save money somewhere so we didn’t do full height tiling here. But I love the tile I chose here and I think it goes really well with the cabinet colour. The only thing I wished I’d done differently here was the tap. Somehow, during our meeting, the cabinet maker convinced us that the tap should be offset to the left, whereas my natural inclination is to use my right hand, and thus offset it to the right. But apparently “most people” use their left hand. I now wish I’d stuck to my guns and flipped the design. Another lesson learned!

Guest bathroom cabinets and tiling
The laundry is also a place where the cabinetry caused me a bit of heartache, as I ended up hating the laminate I chose! I even went so far as to look at the Ikea website for an alternative. I’m blaming the designer for this one, but really I should have gone with my instinct and changed it. Thankfully, the splashback tile makes it look much better. The other bit I was unhappy with was the width of the shelves. The intention here was to insert some wicker baskets to sort the laundry, but somehow the internal measurement I’d provided had been converted along the way to an external measurement, and I approved the plans without double-checking this detail.
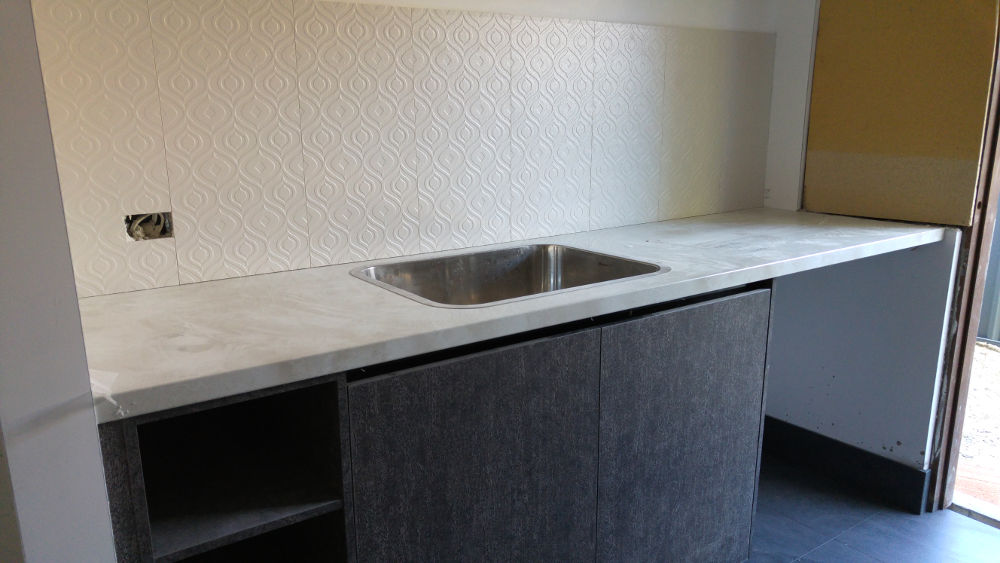
Laundry cabinets and tiling
Next up is the powder room, which carries the same splashback tile as the laundry but marries it with the cabinetry selection from the kitchen. I wanted something a bit more striking here, so brought the tile to the ceiling behind the vanity. I think it looks awesome! There was a slight issue with some of the plastering to the left, next to the doorway, due to a narrow strip of wall between the door frame and the angled wall you see on the left. Narrow bits of wall are problematic for plasterers as it’s difficult for them to get their tools in the thin spots and get a smooth finish, so often they will just build out the plaster so that the wall sits flush with the door frame. This presented a problem as the splashback tiling was now out of whack and wouldn’t align properly on the return, and it also meant that the skirting tile would stick out from the frame. Thankfully, Nulook agreed to rectify it and it’s now going to look perfect! (The same thing happened in my study room, which they are also going to redo – I’m very happy about that!)
Powder room tiles
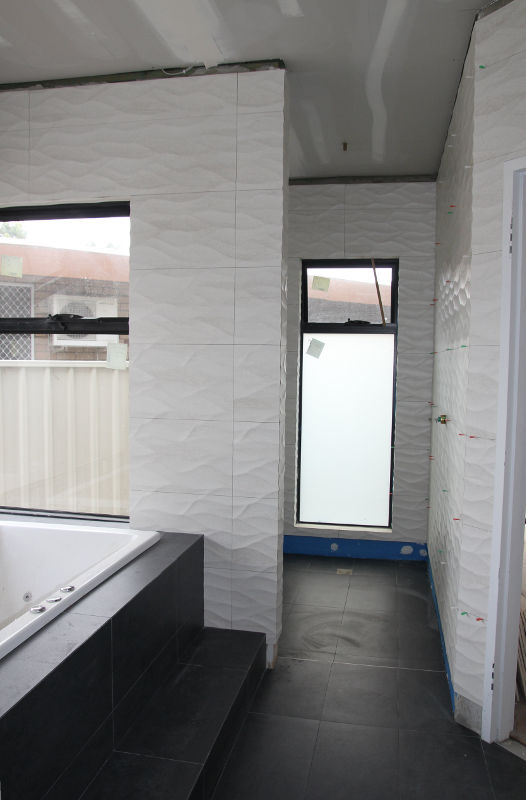
Finally, we bring you to the ensuite. This is another place where I think the cabinets are fantastic, and the overheads even had pull to open doors! Unfortunately, they’d forgotten to put mirrors on the doors so they had to take them off and redo them. Oops.
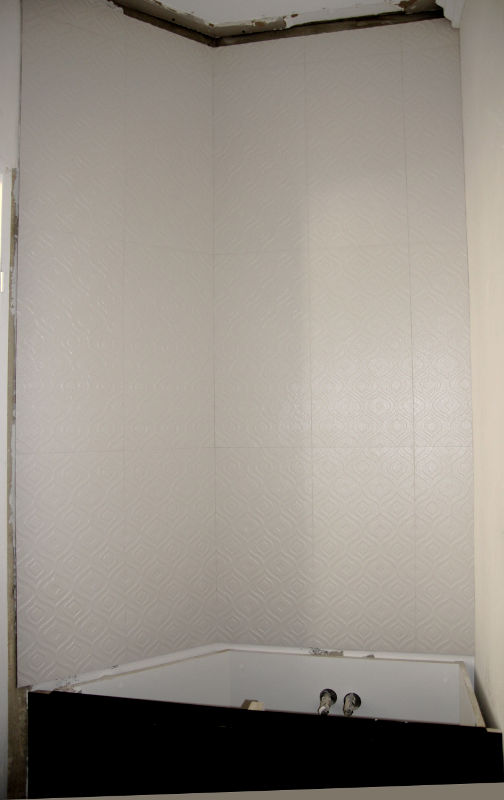
Anyway, the big deal with this room is that the wall tile I’d chosen had caused some drama. I chose a metre-long 3D textured tile. It looks awesome. It’s often used just as a feature tile, but I wanted it used everywhere! This caused a bit of tension initially as the tilers were unfamiliar with how to do the mitring for the edges. Being proud of their work, they were worried that we’d be disappointed if they couldn’t do what we wanted. After a few phone calls and back and forth, we turned up to site one day to find them wearing broad smiles, and I was instantly relieved! They’d worked through the issue with the tile shop and found out how to do the mitring. I was so happy because after seeing these beauties go up, I was in love with my walls! I love the soft off-white colour of these tiles, and the wavy pattern of the texture.
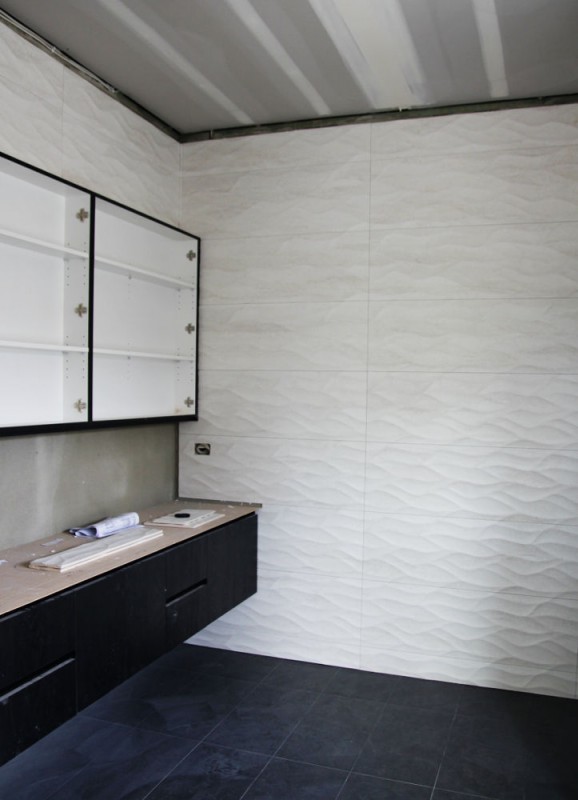
Ensuite cabinets and tiling
And this picture below shows the tiles in the afternoon light — magic! I can’t wait to sit in that spa.

Tiling around the spa
The tiles even go through to the shower, and they did a great job of carrying the pattern through the mitred exterior corners.
Tiling in the shower
Remember at the beginning I said we used Nulook’s tilers for our main flooring as well? As this work wasn’t covered under their warranty, they suggested we lay down cardboard to protect the floors from the other trades that will be passing through the next few weeks. This was our weekend job. We bought 3 rolls of Ram Board from Bunnings and rolled it out over the tiles in the main living area and down the hallway.
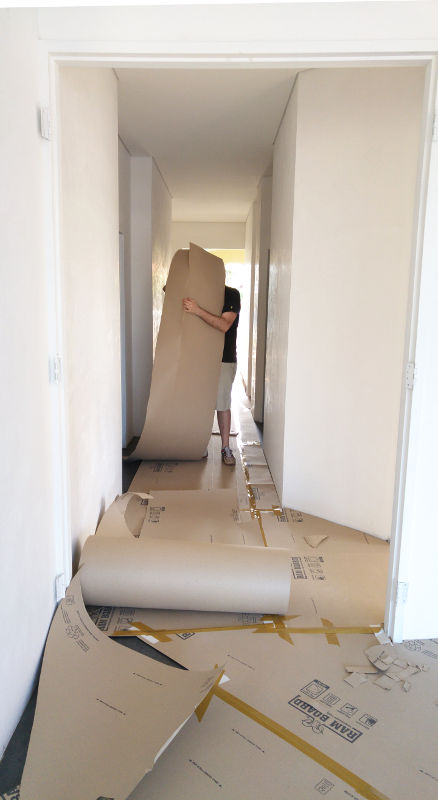
Installing cardboard to protect the tiles
It was relatively easy work, except the constant getting up and sitting down to tape the boards resulted in some very sore legs the next day!
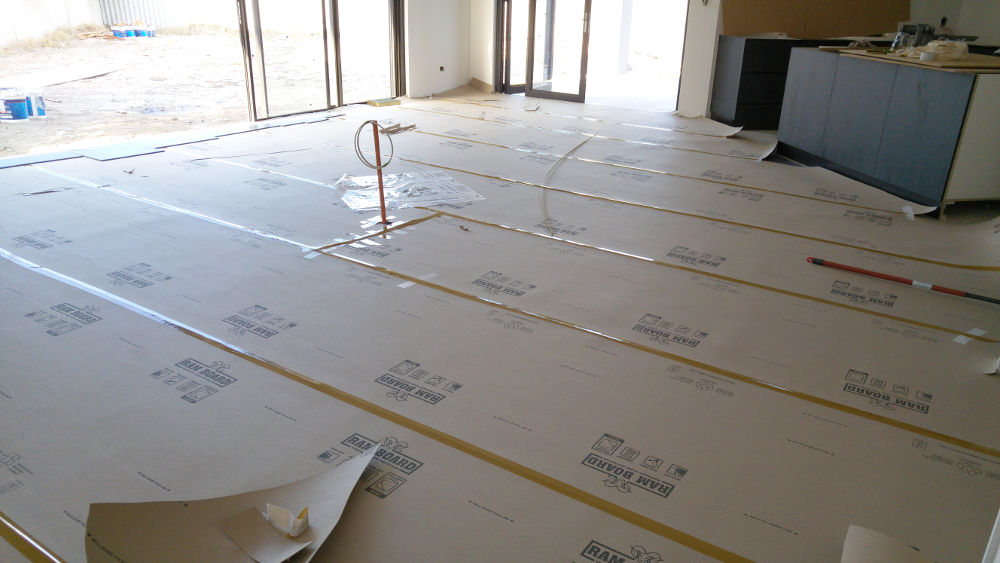
Living area floor tiles protected by cardboard
So what have we learned from this experience? Here are my tips for getting the cabinetry right:
- Don’t let them rush you into signing off the plans until you’ve gone over every single detail. Even if it’s going to cause a delay.
- Check that the opening mechanisms for the doors are written down.
- Check that the location of handles and rails are as you expect them to be.
- Check the measurements are correct. If you don’t have time to check everything, pick a few key places where the sizing is important for practicality, and double-check those. Make sure that if you intend to store specific items in certain places, that those measurements are still correct. Measure the item you want to fit in there.
- Double-check tap locations are where you expect them to be. Observe what hand you use to open and close the taps (do some play-acting!), and make sure they are placed accordingly. You may need to make some adjustments to the design to accommodate this.
- Trust your instinct when it comes to the selections. If you want something to look great but have some doubts, ask to see real life examples. If you can’t see any and have a viable alternative that you’re comfortable with, consider using that instead.
- Don’t let yourself be swayed by other opinions, especially if you don’t agree with those opinions!
Do you have any tips to share?


The tiles and finishes look so nice in place – a moodboard is one thing but seeing them in their final spots is another! 🙂 I like the black veneer, especially in the recessed bar nook, and I’m keen to see how the 3D tile looks in the finished ensuite.
Thanks Steph! You’re right about the mood board – they are fun but nothing beats seeing the finished product!
Busy busy. Your ensuite tiles are truly special, Trixee. I can conjure up the ocean in there. I can see that your tilers really had a challenge and did a good job. I love the bar area. There is something so right about it. As for the push-to-open cabinets, I think you’ll forget they are like that 2 weeks after moving in. Now for my unsolicited opinion on the laundry… Is it a laminated bench top? It’s hard to be sure from the photos, but I’m inclined to think that the cabinets and splash back are good together, but there is a colour in the bench top that is a bit off with the rest. Maybe you’ll learn to love it all. I suspect cabinet doors are cheaper to change than a bench top though. Maybe some clever styling and it will all blend together.
Thanks Jo, the ensuite is magic 🙂 Ahh… the laundry! I don’t think I’ll ever learn to love it, but I will learn to put up with it. Maybe in a couple of years I’ll replace it with an Ikea cabinet. The benchtop is laminated… and I agree the colour is a little off. It was a last minute swap which I should never have done, but the samples looked good together at the time. Ah well. I just focus on the tiles, it’s the one part of the laundry I like!
ALL the tiles are gorgeous! Outstanding choosiness. x
Thank you my sweet, can’t wait to show you in person! xx
Ooooh Trixee – stunning choices. Love your ensuite and the tiles.
As for some of the things you aren’t thst happy with you will find you don’t even notice them after a while. I remember a friend saying to me you stress and worry over things and once you move in you wonder why. One thing we regretted not checking was the size of the recessed bin – we have two small bins which fit under the sink (I think this is what most people have) but we would have preferred one large one but like I said we have got used to it and everything else ticks the boxes.
We have the hanldess cabinets and I love that seamless look and find them so easy to clean.
It really looks fabulous Trixee ☺☺☺☺☺
Thanks Deb! It’s true about the stress, my philosophy is to do all the stressing beforehand and then don’t worry about it once it’s done. Size is everything when it comes to cabinetry, and I think where most of the regretting happens. But it’s usually usable, maybe just not perfect as we would want it to be. On that note, we’re calling our laundry a failure!
Good philosophy ☺
I certainly don’t think the laundry is a failure – pop a few baskets on the top (there are some gorgeous ones around) and you won’t even notice the benchtop that worries you.
It’s not just the benchtop Deb. The cabinetry sizing is wrong, and I don’t like the laminate choice. On top of that, the other day we noticed the power point in the splashback. Why did we put it there, when there were switches on the adjacent wall that it could have fit on? Sometimes, you just don’t remember why you made a design decision. In this case, I suspect it “just happened”. Oh well, ce’st la vie! 🙂
There are so many decisions to be made when building that it is not surprising we sometimes get things wrong or not quite what we hoped for. It is a room that you don’t need to spend much time (I hope) and your visitors shouldn’t need to visit it so that should make it easier.
Your kitchen looks amazing 🙂
Thanks Deb. Yes so true!
True enough, thanks Deb.